1. A walkthrough of the method
(This article is part of a series. You can jump to the previous section or the next section if you would like to.)
In this section, you will get to know the principles behind the rasterization method we will use.
Introduction
The method was first published by Juan Piñeda in 1988, in a paper called “A Parallel Algorithm for Polygon Rasterization” (download here). As the title says, it was made for parallel execution, something we will not set up here, but since the algorithm in principle is quite simple, and also well suited for serial execution, we will use it here.
If you search for triangle rasterization on the web, you will likely find many implementations of Piñeda’s algorithm. The oldest one I have found is by Nicolas Capens, posted on the site devmaster.net (a game developer forum) back in 2004. His code seems to be the original one that has inspired most of the other triangle rasterizer implementations you will find. That web site does not exist anymore, but The Internet Archive has a copy of the posting if you are interested.
The inside test
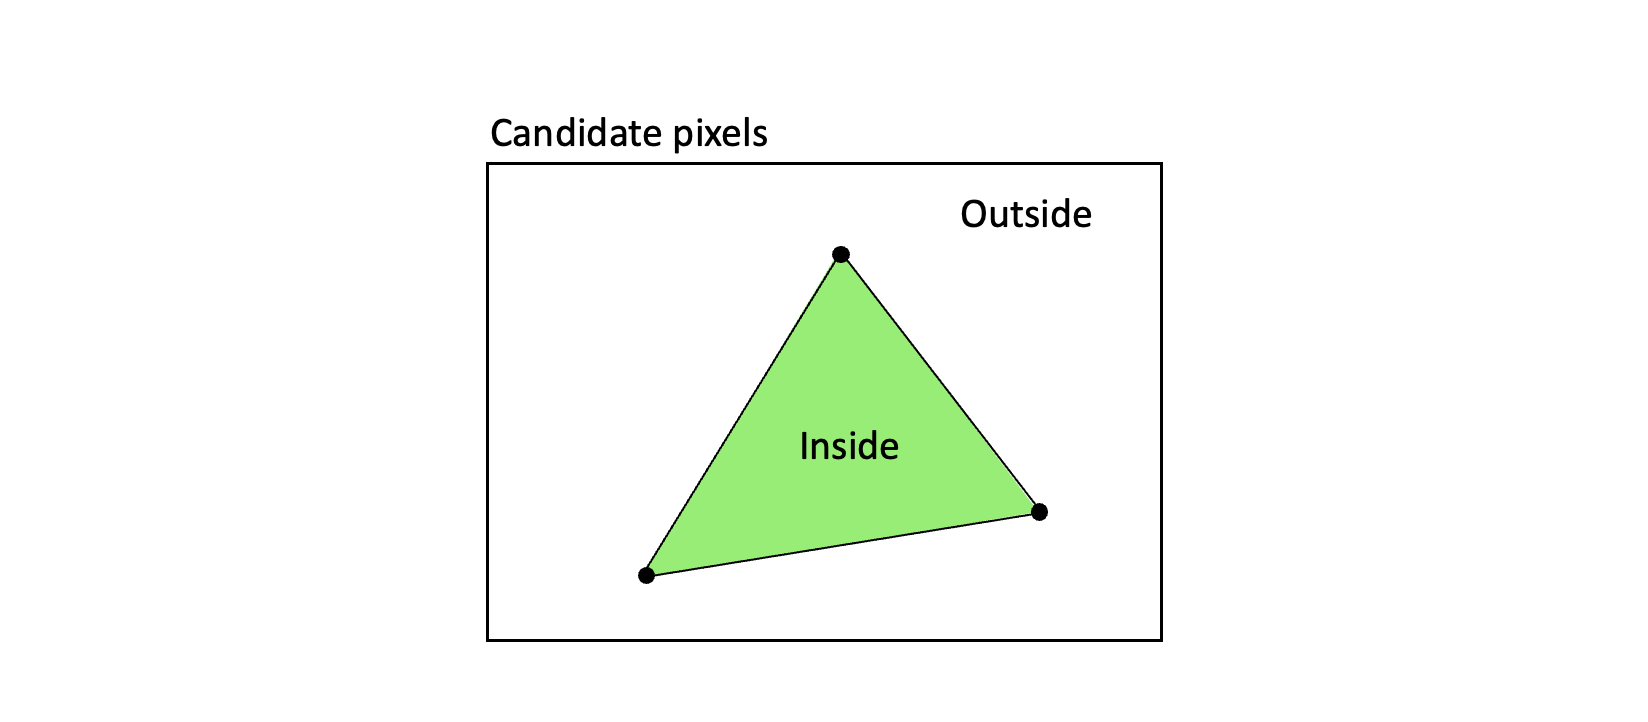
Piñeda’s method is based on scanning a region of candidate pixels, and for each candidate inside that region, finding out whether or not that pixel lies inside the triangle. If it is inside, the pixel is painted with the requested triangle color.
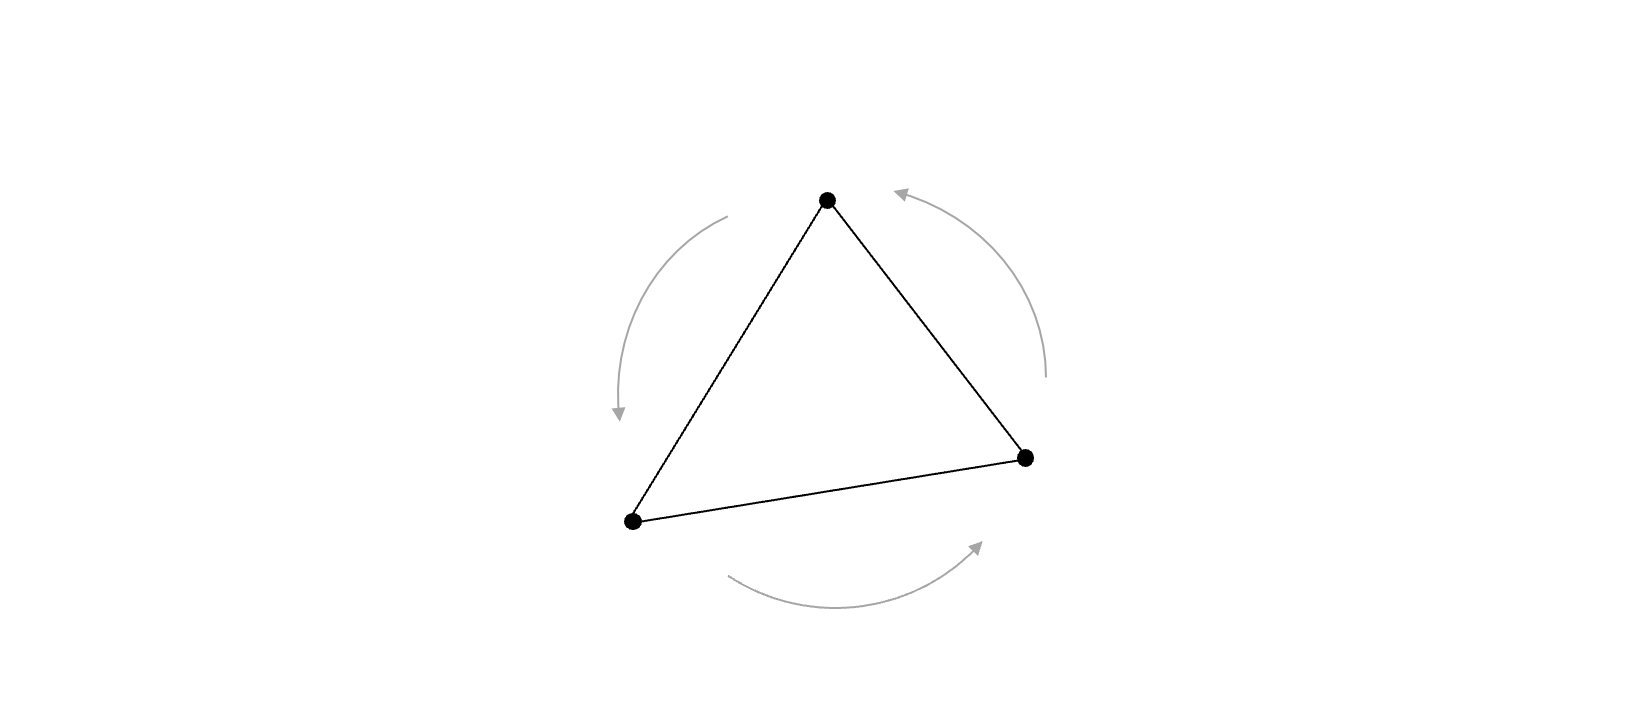
To be able to do this efficiently, we have to set up our triangles in a specific way: We orient the vertices in a consistent order - which here is chosen to be counterclockwise. So, when going from any vertex and to the next, and then to the last one in the triangle, we will make a counterclockwise turn.
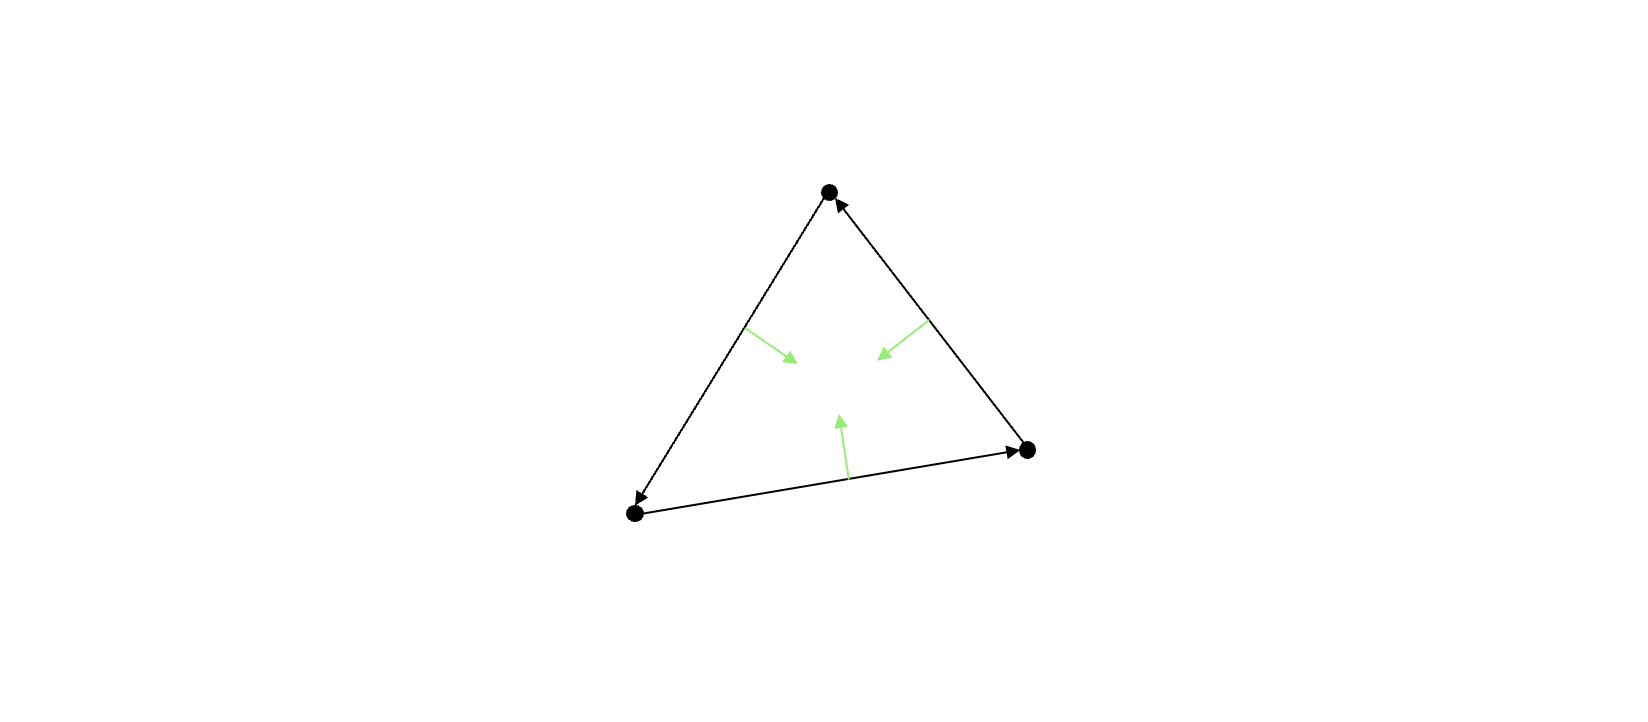
As long as all triangles to be drawn follow that convention, we can define a rule that will decide if a pixel lies inside a triangle or not. Piñeda’s method says: “If a candidate pixel lies to the left of all three edges when we visit the vertices in order, then the pixel is inside the triangle.”
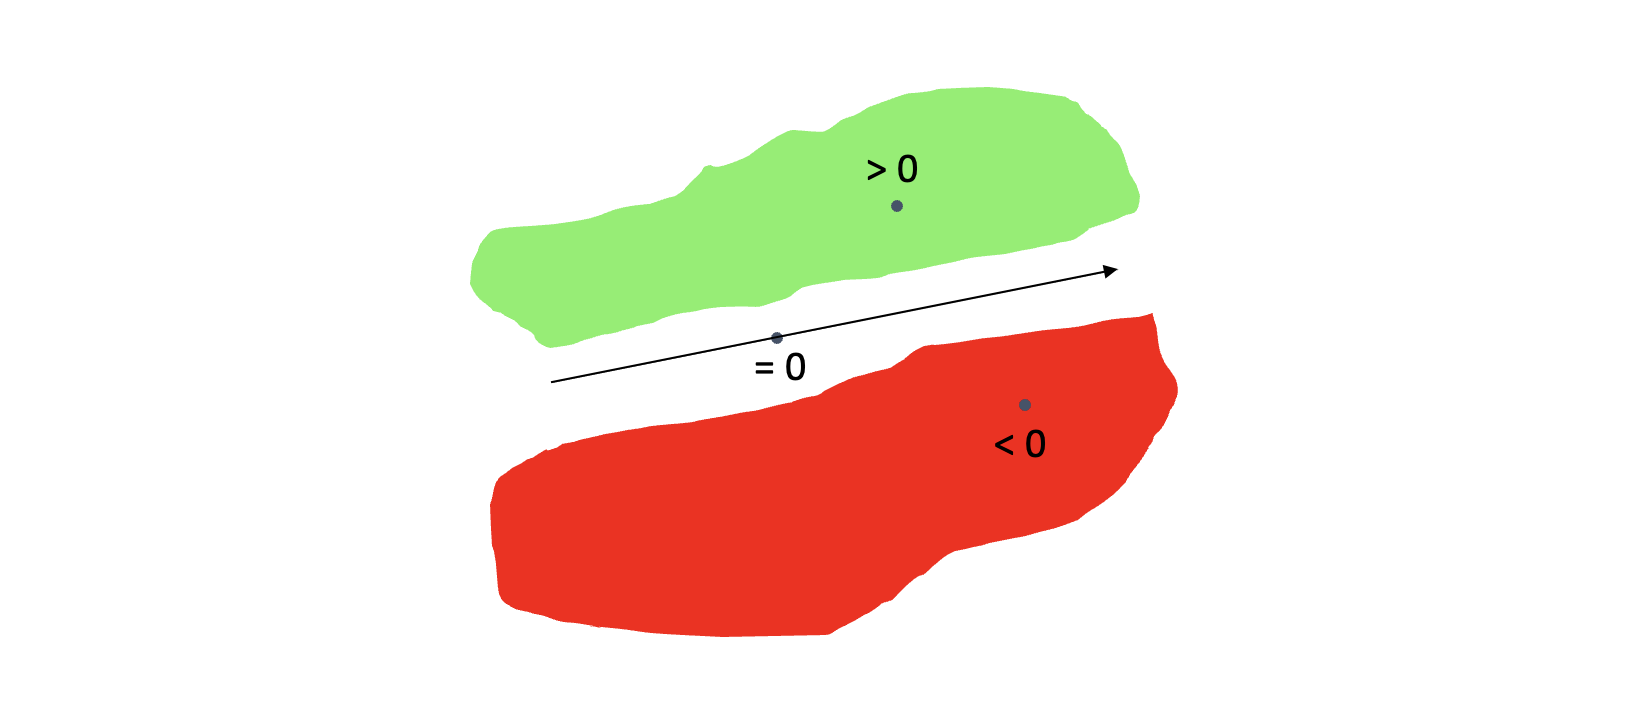
Finding out if a pixel lies to the left of an edge is not so hard. We can use a function that takes three coordinates as parameters - an edge start point, an edge end point, and a candidate pixel - and that returns a positive, zero or negative value. The result is positive if the candidate pixel is to the left of the edge, it will be zero if the pixel is exactly on the edge, and negative if the pixel is to the right.
(This function is the same as Bresenham’s line algorithm is based on.)
In code, such a function can look like this:
getDeterminant(a, b, c) {
    const ab = new Vector(b);
    ab.sub(a);

    const ac = new Vector(c);
    ac.sub(a);

    return ab[1] * ac[0] - ab[0] * ac[1];
}
The function receives three inputs a, b and c. The edge coordinates are a and b, and the candidate pixel coordinates is c. (A Vector here simply represents an array of values - where the value at index 0 is the x-coordinate, and at the value at index 1 is the y-coordinate.)
The code calculates two vectors ab and ac. These vectors describe the differences in x- and y-coordinates when going from a to b and from a to c. It then cross-multiplies those vectors. This is the same as calculating what is called a determinant - if the vectors were organized in a 2-by-2 matrix. You may recall this as a cross product. And it sure is, the resulting value here is the same as the z component of the cross product of ab and ac, if they were 3-dimensional vectors.
In this tutorial, we will call the result of this calculation a determinant value.
We repeat this edge test for each of the three edges in the triangle - and by doing so we have an complete inside test for the triangle.
Finding candidate pixels
At this point, we have a working inside test - as long as the vertices are specified in a counterclockwise order. The next question is: Which pixels should we apply the test on?
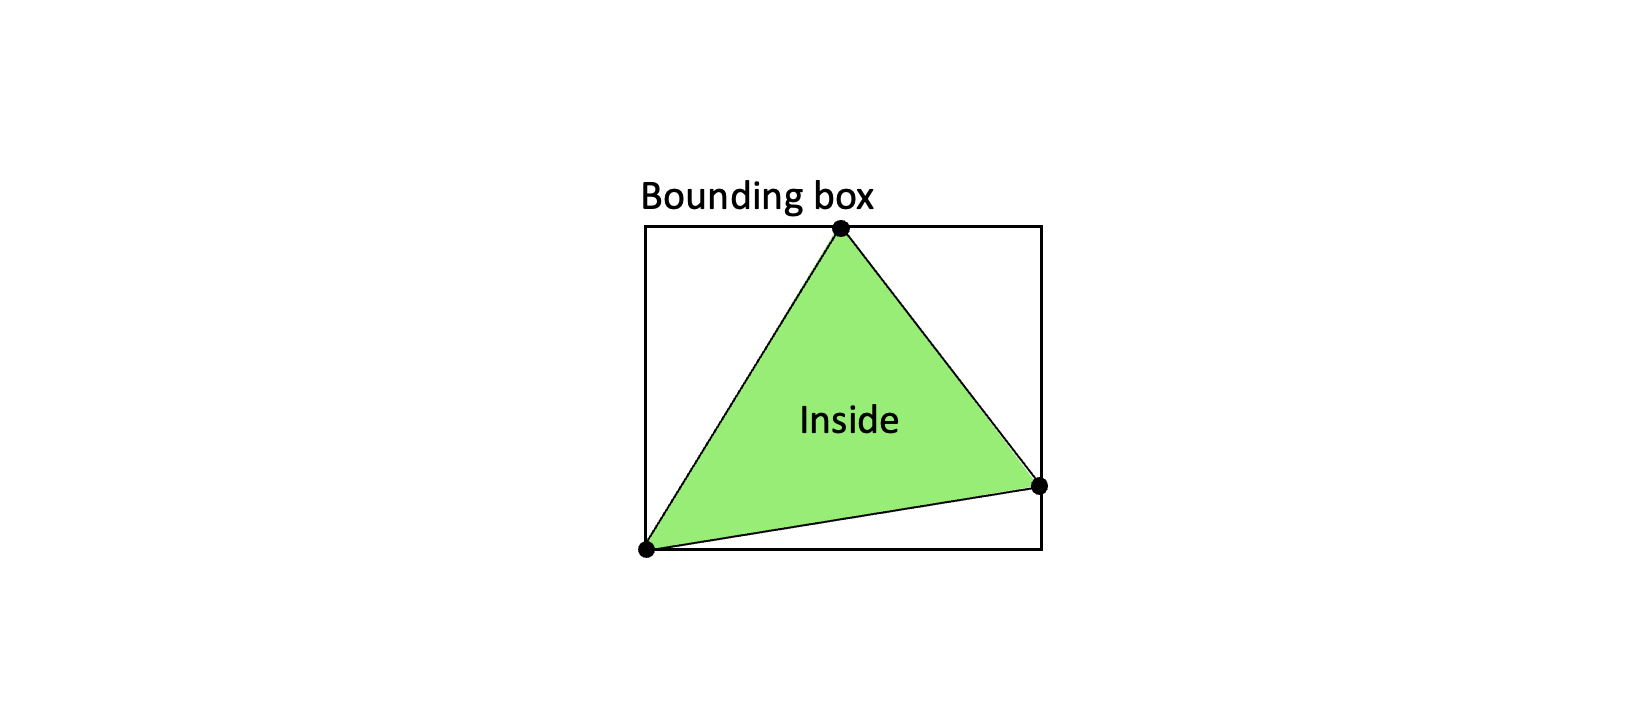
The first idea could be to just test all pixels on screen, but we can be more efficient than that - we could test just the pixels inside a bounding box enclosing the triangle. This way we test fewer pixels, but still all that are needed. If calculating a bounding box is fast (faster than testing the pixels outside it), then this will be the most efficient solution.
Taking the minimum and maximum values of all the vertex coordinates gives us the coordinates of the bounding box. This is a very fast operation, so we will use that optimization here.
In code, finding the corner points of the bounding box looks like this:
const xmin = Math.min(va[0], vb[0], vc[0]);
const ymin = Math.min(va[1], vb[1], vc[1]);

const xmax = Math.max(va[0], vb[0], vc[0]);
const ymax = Math.max(va[1], vb[1], vc[1]);
Here, the Vectors va, vb vc contain the vertex coordinates of the triangle.
Drawing the triangle
Now we have all we need: We can loop through all points inside the triangle bounding box, we can calculate three determinant values (based on each of the triangle edges and the current candidate pixel), and if all the determinant values are positive, we know that the candidate pixel is inside the triangle. (The determinant even has the nice property that the value is proportional to the shortest distance between the pixel and a point on the edge.)
If the pixel is inside we paint it with the desired triangle color. (For now we also assume that a pixel exactly on a triangle edge also belongs to that triangle.)
The code could look like this:
for (let y = ymin; y <= ymax; y++) {
    for (let x = xmin; x <= xmax; x++) {
        p[0] = x;
        p[1] = y;

        w[0] = getDeterminant(vb, vc, p);
        w[1] = getDeterminant(vc, va, p);
        w[2] = getDeterminant(va, vb, p);

        if (w[0] >= 0 && w[1] >= 0 && w[2] >= 0) {
            drawPixel(p, color)
        }
    }
}
The code here draws pixels - something that has not been explained yet. Don’t worry, we will get to that in the next section - where we go through how to set up the browser to run code and draw pixels one by one.